
Parallel Jobs, Data Ingress, and Egress
We can continue to build upon this Fuzzfile to create a workflow whose Directed Acyclic Graph (DAG) of jobs fans out into parallel work and back in again. It also adds data ingress and egress to demonstrate how to import and export data to and from your workflow.
Our enhanced workflow will perform the following steps:
- Create multiple parallel jobs that run the
cowsayprogram with different options to generate varied visual outputs - Use data ingress to import external data rather than generating content from scratch
- Append additional content using the fortune command
- Employ a final job to concatenate all results into a single comprehensive output file
- Implement data egress to transfer the final file to an external S3 bucket using preconfigured authentication credentials
To complete this example you need:
- Permission to create ephemeral volumes in your Fuzzball environment
- Access to an external S3 bucket with read/write permissions
- A properly configured secret with authentication credentials for your S3 bucket
If you do not have these prerequisites, review the linked documentation or contact your administrator to request the necessary permissions.
Reopen the workflow from the last example in the Workflow Editor, as described in Adding Dependent Jobs and Volumes.
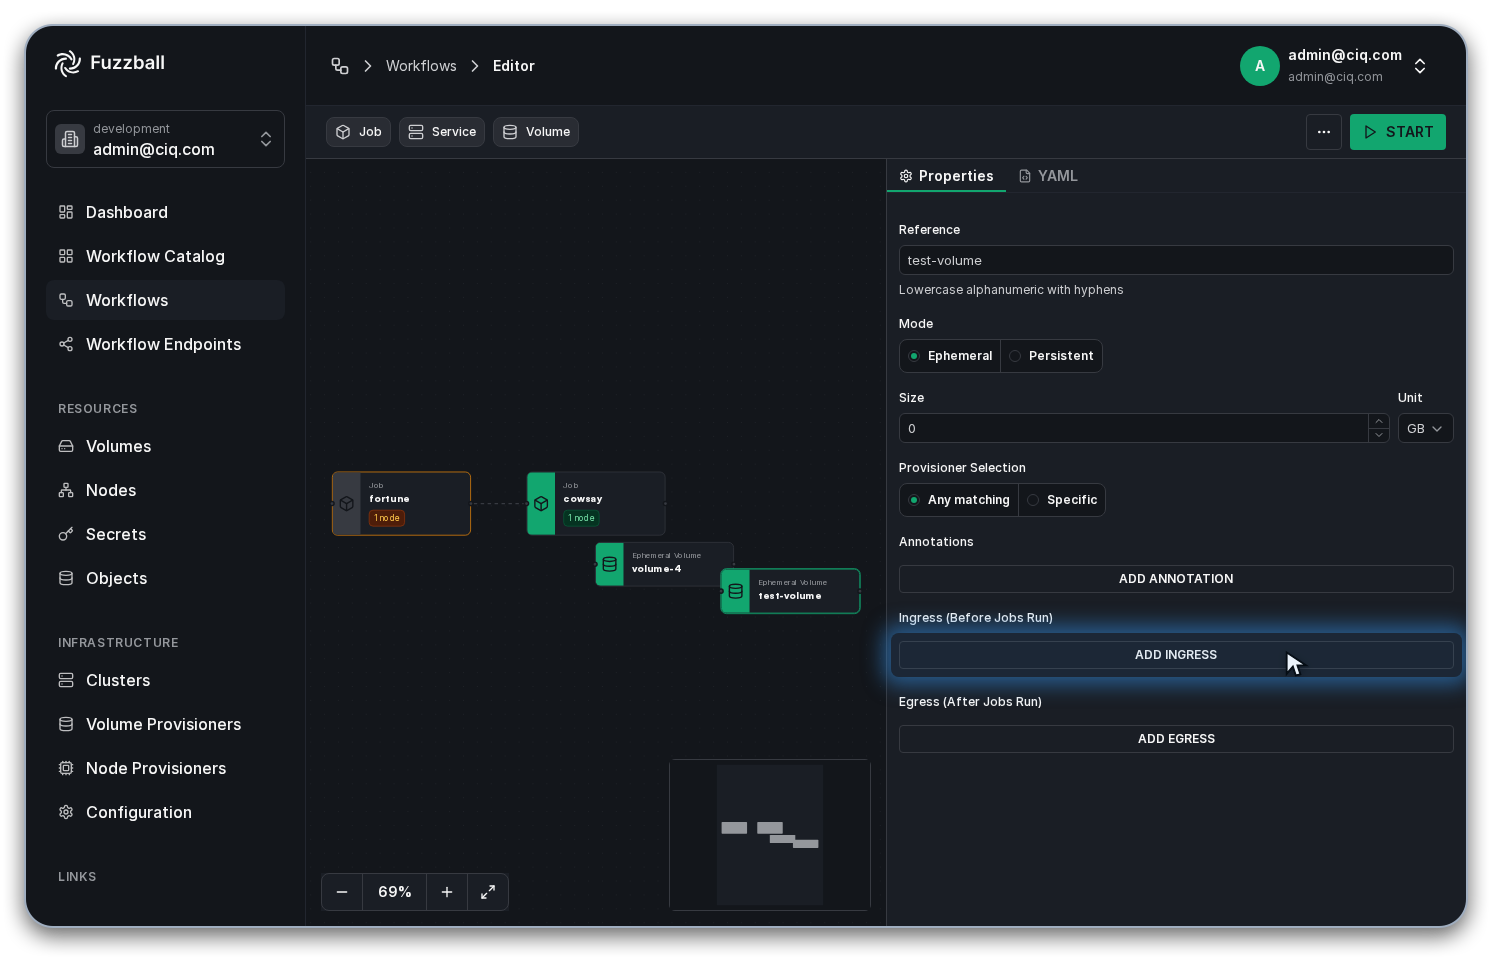
First, add data ingress to the existing volume so that it starts with some data already on it.
This example pulls a public file from GitHub containing the text Hello World!. Select the volume
card supporting the jobs – test-volume in this example – to open its properties, then select
Add Ingress:
A new dialog box opens up to guide you through the process of creating ingress. You can use the drop-down beside “Source URI” to select “HTTPS”. Now you can add the following text to the dialog box to get the README.md file from one of Octocat’s repo on GitHub.
raw.githubusercontent.com/octocat/Hello-World/master/README
Because this file is the starting point for a new fortune, set the destination to a file called
fortune.txt. Keeping the same file name as the last example means the jobs need no further
changes.
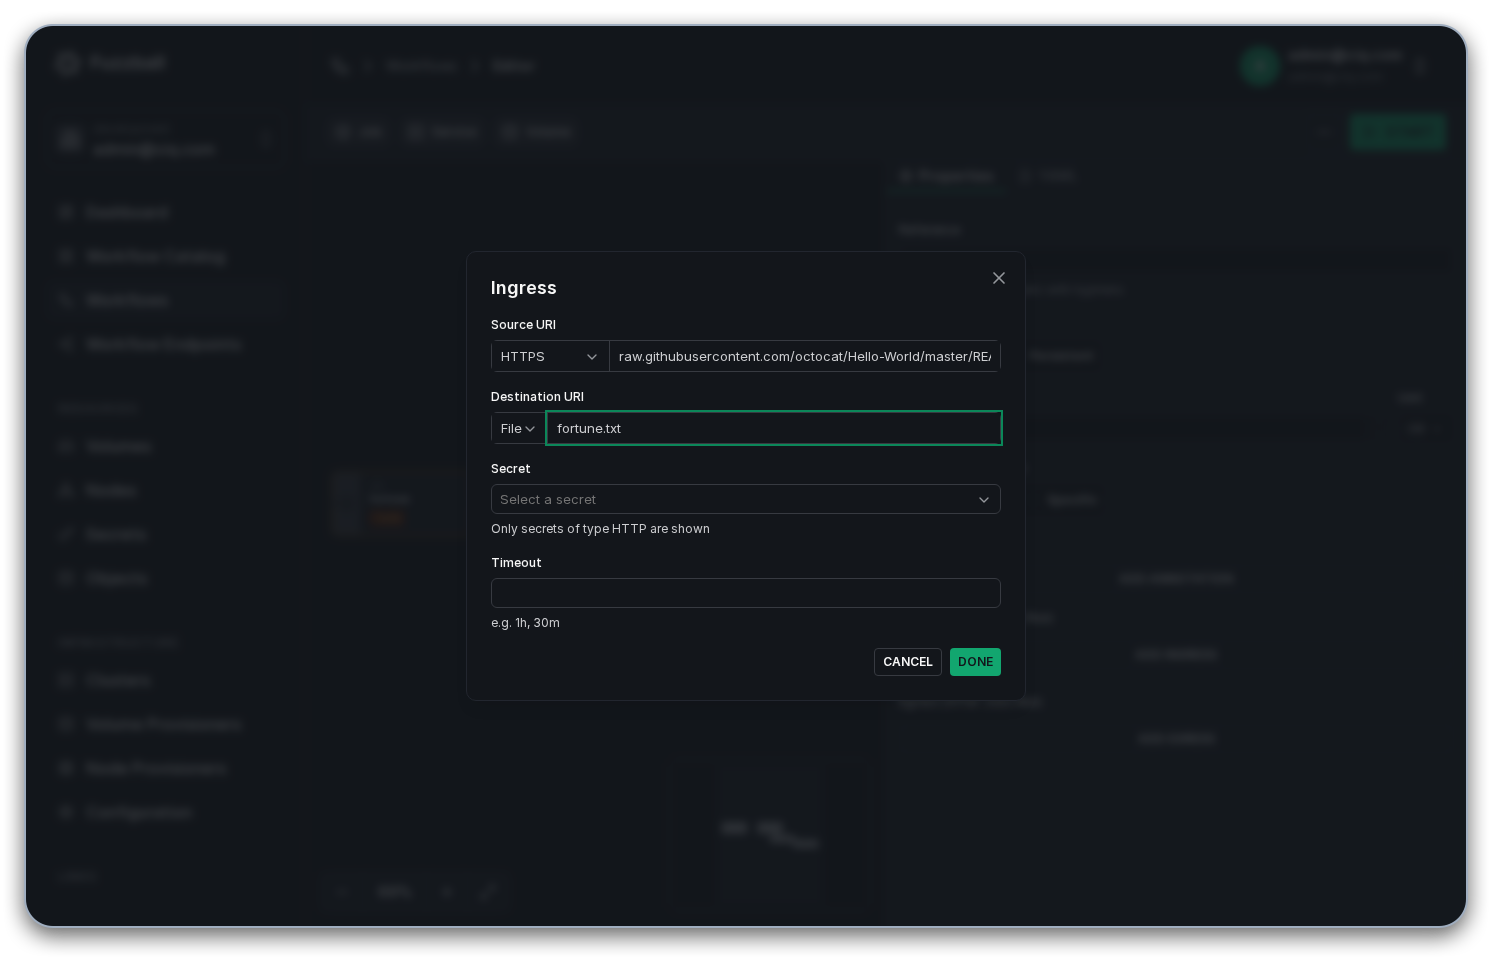
After selecting Done, check the changes under Ingress (Before Jobs Run) in the volume’s properties.
Now make a small change to the fortune job. Select the job to open the Job tab in the job
configuration menu. Add a second angle bracket (>) to the command so that standard out is
appended to the file end instead of overwriting. The command should look like this:
fortune >>/tmp/fortune.txt
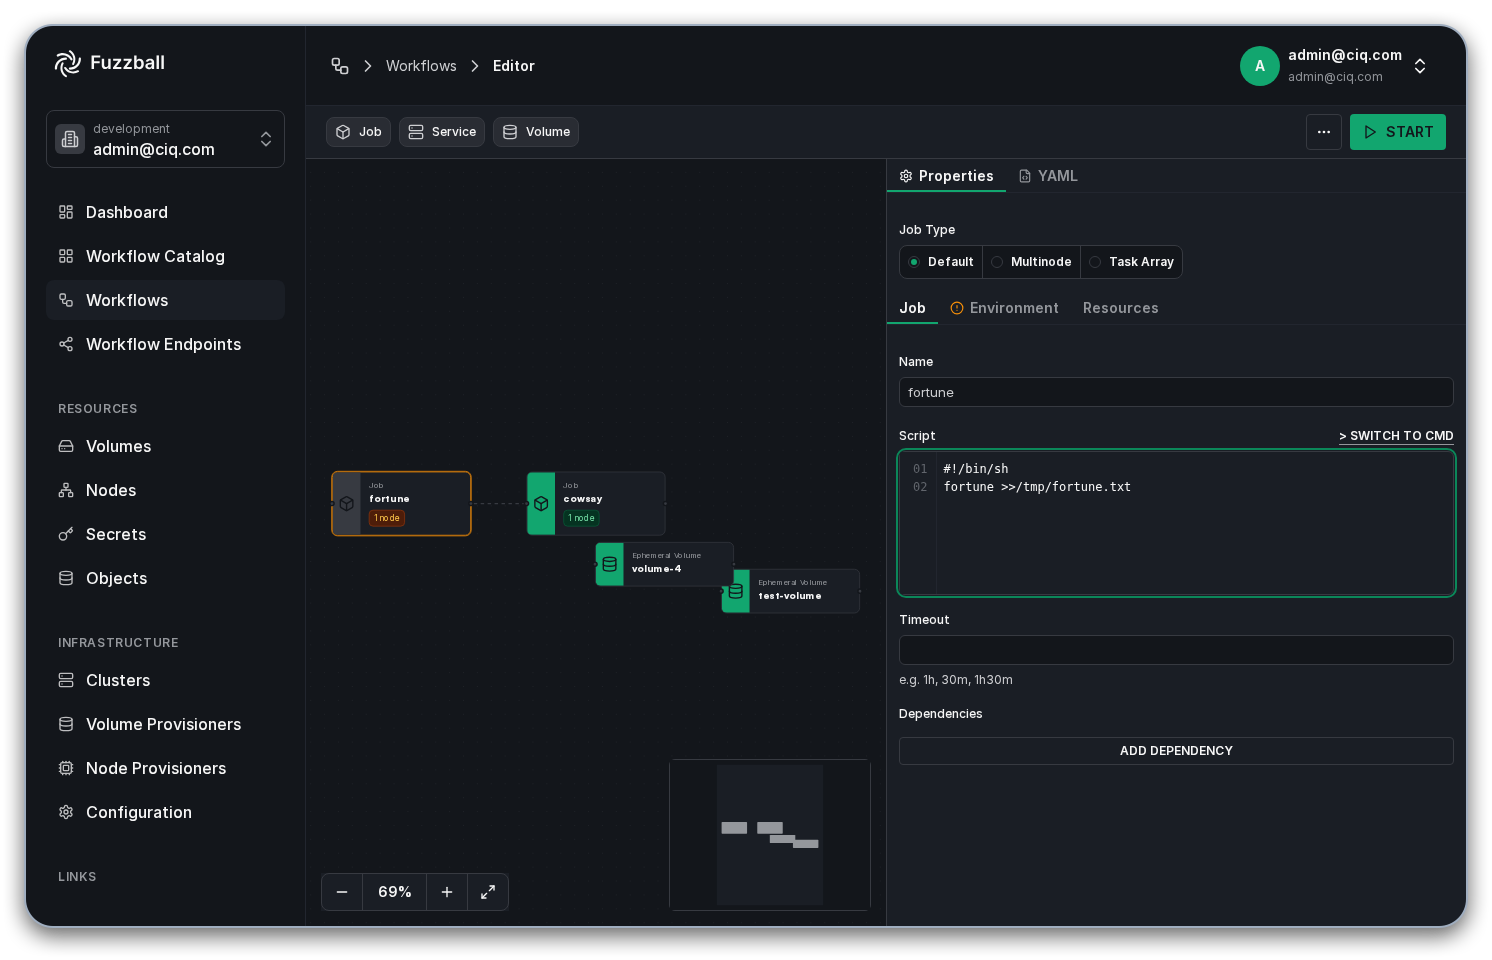
Now the fortune command will append some text to the file we got from GitHub instead of
overwriting it.
Next, change the cowsay job so that it saves a file instead of writing standard output to the
log. Append >/tmp/cow1.txt to the command, so the full command reads:
cat /tmp/fortune.txt | cowsay >/tmp/cow1.txt
Next, add a few more jobs to run in
parallel with the job that runs the
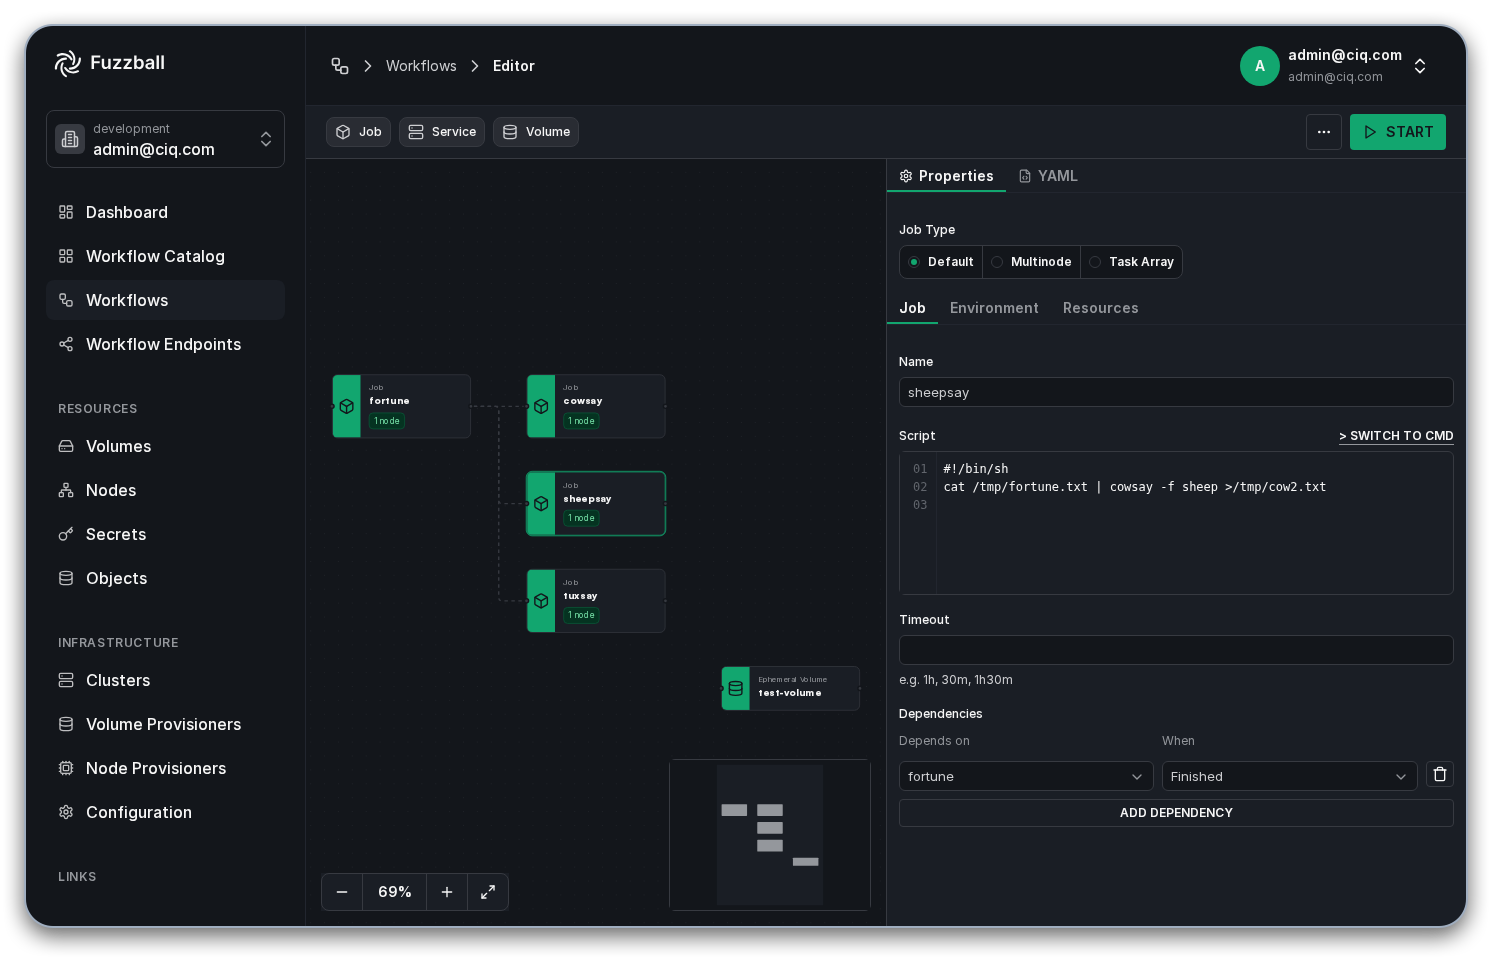
cowsay command. These jobs create a few different ASCII-art files. Drag two more jobs from the
toolbox at the top of the canvas into the workflow grid and name them sheepsay and tuxsay.
Finally, draw lines from the fortune job to these new jobs to indicate that these two also
depend on the fortune job finishing.
If you are comfortable editing the Fuzzfile directly, it may be quicker to open the YAML tab and copy the text block under thejobsfield to clone thecowsayjob with all of its settings in place.
If the layout has become untidy, press o to organize the jobs automatically.
Now configure the new jobs. Copy all of the settings from the cowsay job to the new sheepsay
and tuxsay jobs, including the mounted volume
configuration.
The one change that we will make to the sheepsay and tuxsay jobs respectively is that we will
need to tweak their commands to make them produce different output and save it to different files.
You can make their commands look like this:
cat /tmp/fortune.txt | cowsay -f sheep >/tmp/cow2.txt

cat /tmp/fortune.txt | cowsay -f tux >/tmp/cow3.txt
Now create another job to concatenate all of the results into a single file. This job runs after all of the other jobs complete, and the DAG reflects that.
Use the drag and drop widget to create another job in your workflow grid. Name this job
concatenate. Draw connections from all three *say jobs to the top of the new concatenate
job. Your finished workflow should look like this in the editor.
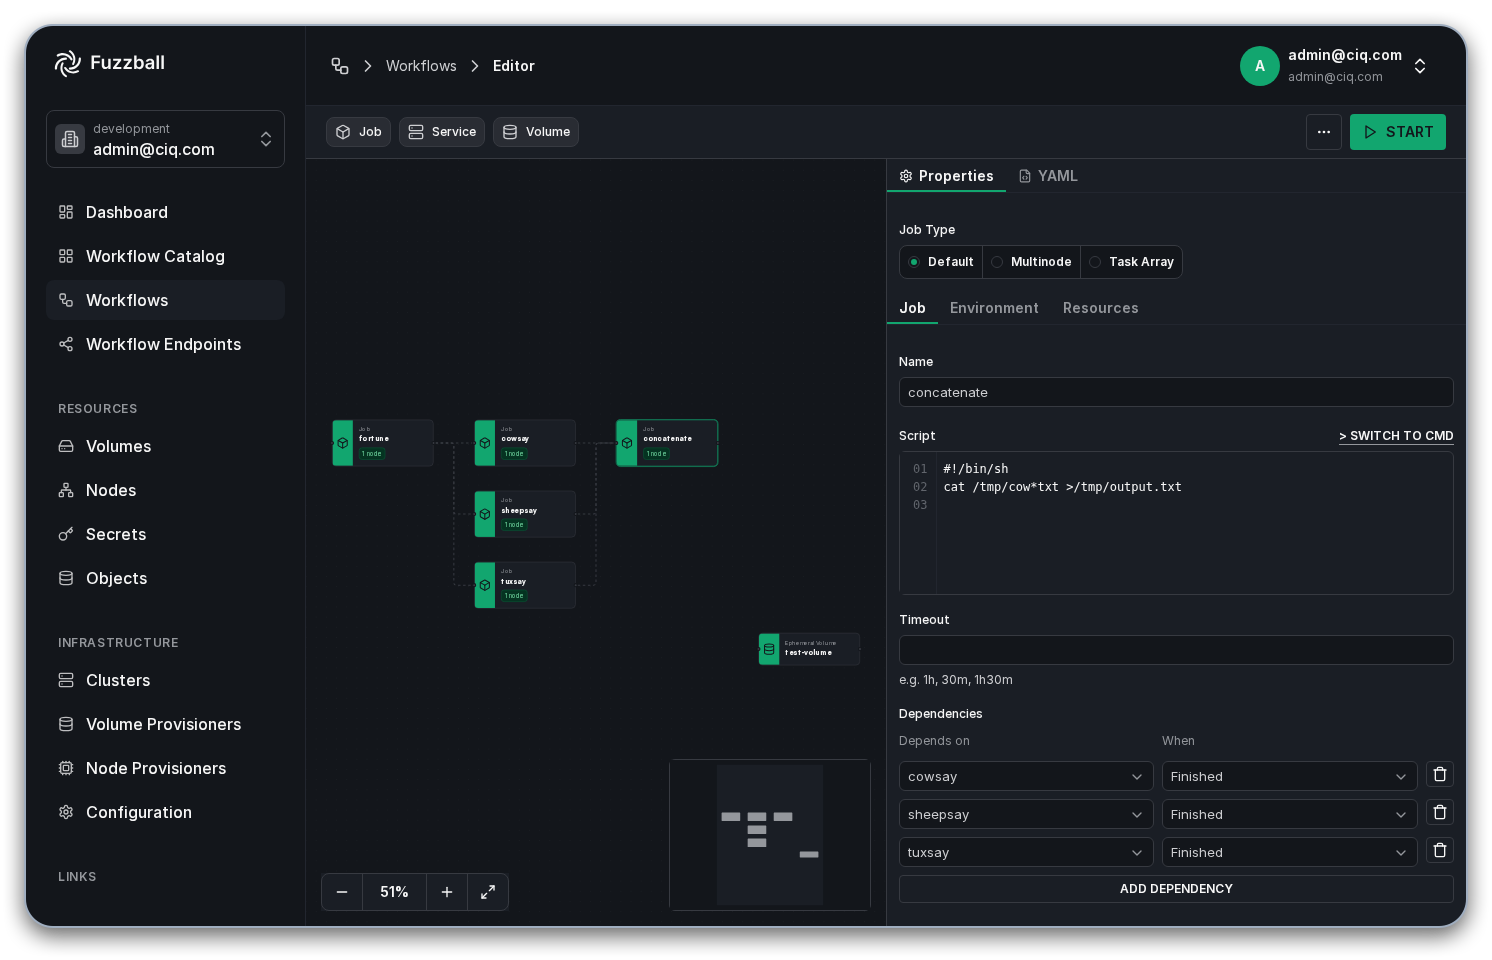
In the Job tab, make sure to add the following command to the concatenate job.
cat /tmp/cow*txt >/tmp/output.txt
This job needs no special programs installed in the container that supports this job, so you can use the lightweight Alpine container by heading to the Environment tab and adding the following URI:
docker://alpine
While you are there, select Add mount and bind test-volume to /tmp as you did for the
previous jobs.
Then you can go to the Resources tab and
allocate one core and 1 GB of memory. Once you save your changes, the concatenate job is fully
configured.
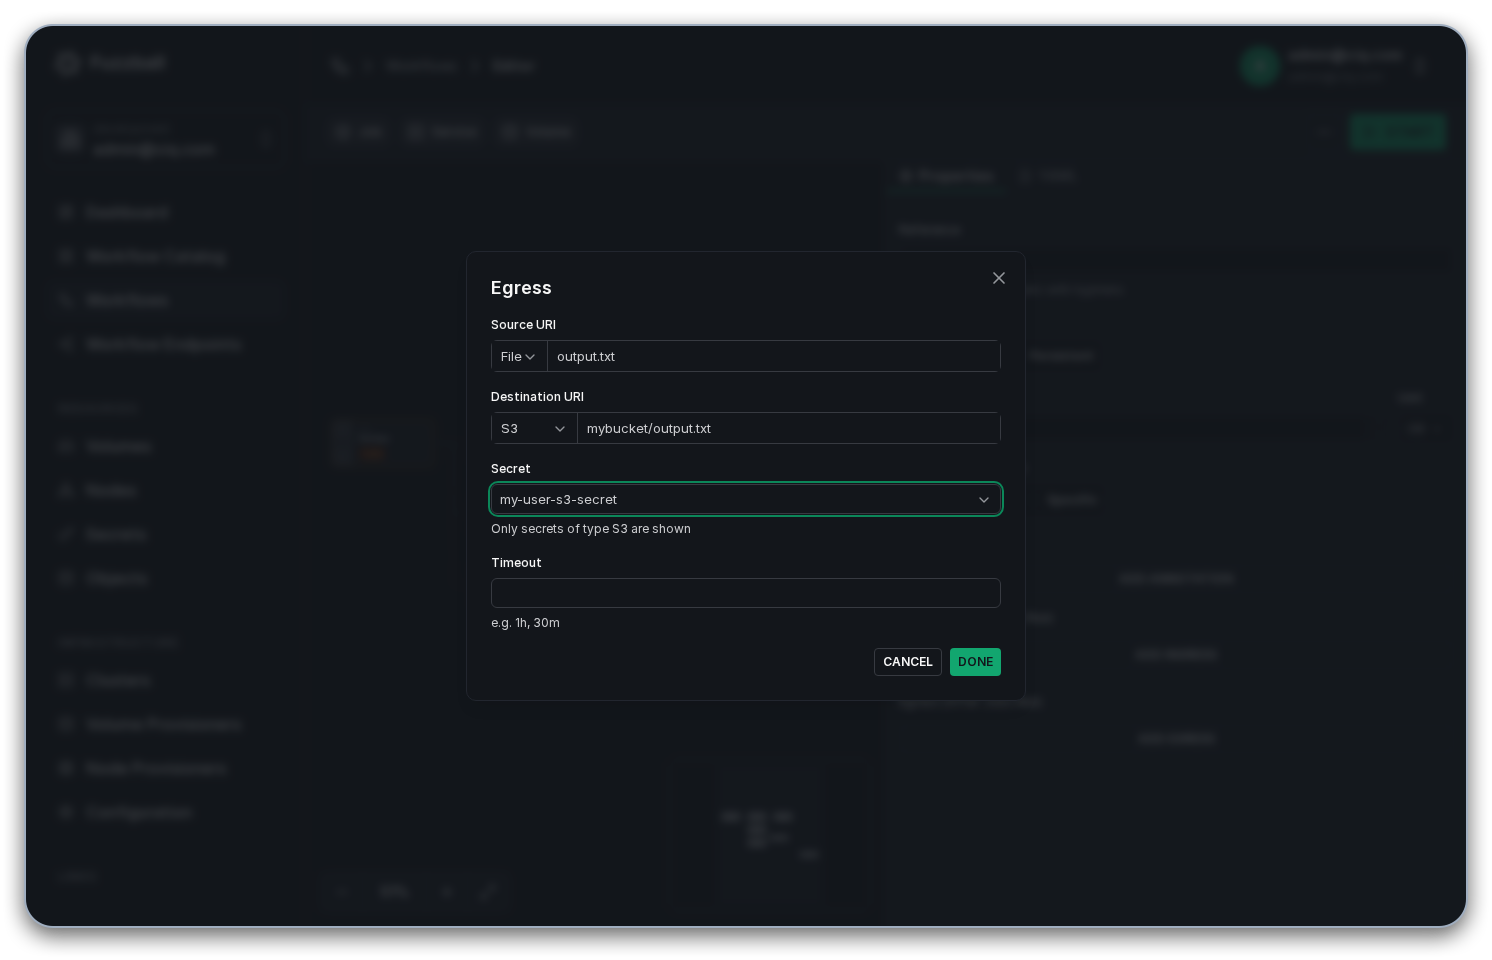
To finish the example, use data egress to save output.txt to a location of your choice. Select
the test-volume card set up earlier to open its properties, then select Add Egress. In the
dialog box that opens, fill in the fields as follows:
- Source URI: leave the scheme set to File and enter
output.txt, the path of the file inside the volume. - Destination URI: select S3 and enter
<bucket-name>/<object-key>. Fuzzball adds thes3://prefix, so the full destination iss3://<bucket-name>/<object-key>.<bucket-name>is the plain name of the bucket, such asmybucket. It is not the bucket’s ARN, an access point alias or ARN, or a URL such ashttps://mybucket.s3.amazonaws.com. The S3 console lists your buckets by name, andaws s3 lsprints them from the command line.<object-key>is the name the file gets in the bucket. It can include a path, such asresults/output.txt.
- Secret: select the S3 secret that holds credentials for the bucket. The secret also supplies the bucket’s region and S3 endpoint; see S3 secrets.
The screenshot below shows one set of values; substitute your own bucket and secret.
After running the workflow and downloading the resulting output.txt file, you should see
something like this. Your fortune will probably be different.
 _________________________________________
/ Hello World! If you sow your wild oats, \
\ hope for a crop failure.                /
 -----------------------------------------
        \   ^__^
         \  (oo)\_______
            (__)\       )\/\
                ||----w |
                ||     ||
 _________________________________________
/ Hello World! If you sow your wild oats, \
\ hope for a crop failure.                /
 -----------------------------------------
  \
   \
       __
      UooU\.'@@@@@@`.
      \__/(@@@@@@@@@@)
           (@@@@@@@@)
           `YY~~~~YY'
            ||    ||
 _________________________________________
/ Hello World! If you sow your wild oats, \
\ hope for a crop failure.                /
 -----------------------------------------
   \
    \
        .--.
       |o_o |
       |:_/ |
      //   \ \
     (|     | )
    /'\_   _/`\
    \___)=(___/
As in the previous sections, you can see the Fuzzfile at any time from the Workflow Editor by selecting the YAML tab in the panel on the right. The Fuzzfile the Workflow Editor generates is now considerably longer, but every part of it corresponds to a step carried out above.
version: v4
defaults:
  job:
    mounts:
      /tmp: test-volume
volumes:
  test-volume:
    use: ephemeral
    size: 1GB
    egress:
      - source:
          uri: file://output.txt
        destination:
          uri: s3://mybucket/output.txt
          secret: secret://user/my-user-s3-secret
    ingress:
      - source:
          uri: https://raw.githubusercontent.com/octocat/Hello-World/master/README
        destination:
          uri: file://fortune.txt
jobs:
  fortune:
    image:
      uri: docker://wresch/lolcow
    script: |
      #!/bin/sh
      fortune >>/tmp/fortune.txt
    resource:
      cpu:
        cores: 1
      memory:
        size: 1GB
  cowsay:
    depends-on:
      - name: fortune
        status: FINISHED
    image:
      uri: docker://wresch/lolcow
    script: |
      #!/bin/sh
      cat /tmp/fortune.txt | cowsay >/tmp/cow1.txt
  sheepsay:
    depends-on:
      - name: fortune
        status: FINISHED
    image:
      uri: docker://wresch/lolcow
    script: |
      #!/bin/sh
      cat /tmp/fortune.txt | cowsay -f sheep >/tmp/cow2.txt
  tuxsay:
    depends-on:
      - name: fortune
        status: FINISHED
    image:
      uri: docker://wresch/lolcow
    script: |
      #!/bin/sh
      cat /tmp/fortune.txt | cowsay -f tux >/tmp/cow3.txt
  concatenate:
    depends-on:
      - name: cowsay
        status: FINISHED
      - name: sheepsay
        status: FINISHED
      - name: tuxsay
        status: FINISHED
    image:
      uri: docker://alpine:latest
    script: |
      #!/bin/sh
      cat /tmp/cow*txt >/tmp/output.txt
That covers the main parts of building a workflow through the web UI. The remaining pages in this section cover Fuzzfile features that have no Workflow Editor equivalent and are written directly into the YAML: encrypted SIF images and host networking for multinode services.
Job arrays and distributed jobs are covered in Parallel and Distributed; GPU jobs and other advanced resource requests in Advanced Hardware.